Assuming
the installation of the .NET Framework, the 3.0 MMC Console and Windows
PowerShell are taken care of when you place the DVD into the machine.
or begin the installation from a mounted ISO file and the installation
wizard begins and the opening splash screen already has you at the
point where you must select Step 4: Install Microsoft Exchange Server
2007 SP1 (as shown in Figure 1). At this point you will perform the following:
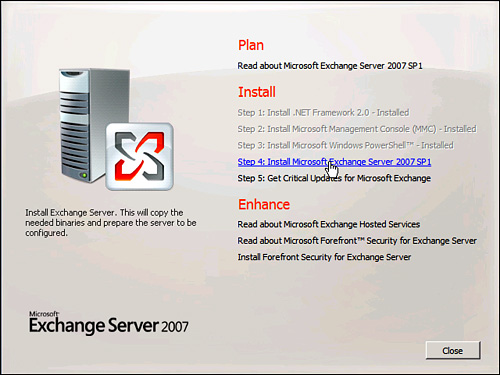
1. | Select the link from Step 4 to begin the installation wizard.
| 2. | You
are taken to the Introduction screen, which provides information
regarding some of the new features and functionality included with SP1.
After reading the information provided, select Next.
| 3. | You
are taken to the License Agreement screen where you can scroll down and
read the entire agreement if you like. You can choose Print to get a
portable, easy-to-read version of the agreement. There are two options.
You either choose I accept the terms in the license agreement or I do
not accept the terms in the license agreement. Note, if you do not
accept, you cannot continue with the installation process. After you
choose, select Next.
| 4. | You
are taken to the Error Reporting screen. Here you are asked to
participate in a group effort with Microsoft to determine why certain
errors occur on systems. If you choose Yes (Recommended), errors that
occur automatically send reports to Microsoft without further
permission. The other option is No. Choose one and then select Next.
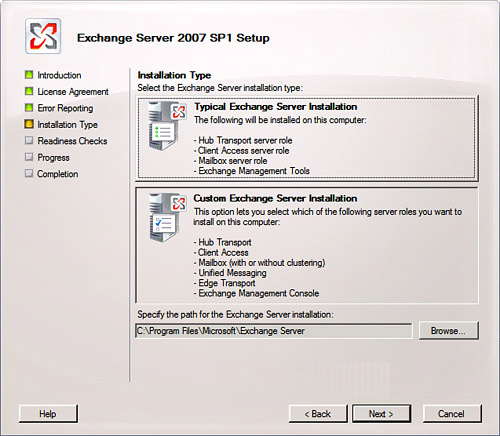
| 5. | This brings you to the Installation Type screen shown in Figure 2;
here, you can choose either a Typical or Custom Exchange Server
installation. In this case, we select Typical Exchange Server
Installation, which installs the Hub Transport server role, the Client
Access server role, the Mailbox server role, and the Exchange
Management tools on the server. Confirm the path for the Exchange
Server installation files and choose Next.
| 6. | If
it is the first server in the organization, you are taken to the
Exchange Organization screen, where you are asked to provide a name for
your Exchange organization. When that is done, choose Next.
| 7. | You
are now taken to the Client Settings screen, which asks a simple
yes-or-no question regarding the type of clients you use. If you use
only Outlook 2007 clients, choose No. If you have Outlook 2003 or
Entourage clients, choose Yes. Choosing Yes indicates that you have a
need for a Public Folder database to be set up (because this is part of
the requirements for legacy clients). After you choose, select Next.
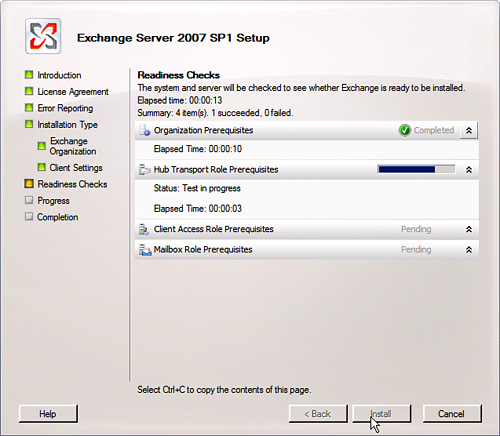
| 8. | You
are taken to the Readiness Checks screen, where the system is checked
to see whether Exchange is ready to be installed or if something is
missing. First, the Organization Prerequisites are checked and then the
Hub Transport, Client Access, and Mailbox roles, as shown in Figure 3, are checked. When the checks are complete, select Install.
| 9. | You
are taken to the Progress screen, where you are shown the progress and
elapsed time for the installation procedure to take place. Barring any
unforeseen issue at this point, you simply need to give it a little
time and it completes the installation.
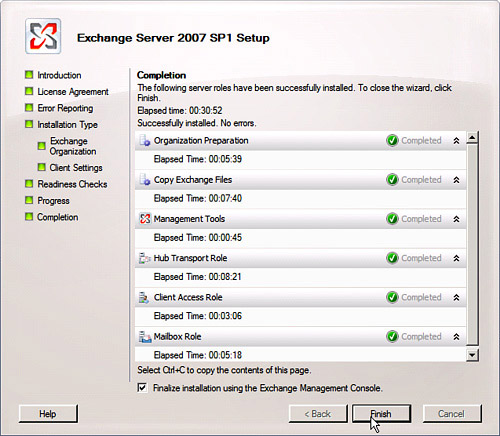
| 10. | You are shown a Completion screen, as shown in Figure 4,
with a view of which items completed installation (hopefully all of
them), and there is a checkbox (Finalize Installation Using The
Exchange Management Console) at the bottom that is checked by default.
Select Finish.
|
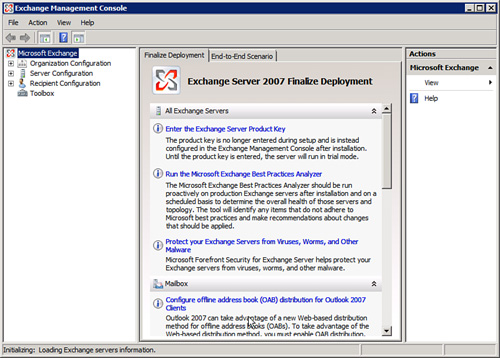
At
this point, you can do one of two things. You can go back to the
installation disk and perform Step 5, “Get Critical Updates for
Microsoft Exchange.” Or, you can move forward with the EMC and follow
the prompts prepared for you in Finalize Deployment, shown in Figure 5.
This includes items such as Enter the Exchange Server Product Key, Run
the Microsoft Exchange Best Practices Analyzer, and on, with
instruction provided for each server role.
|